I could choose to pay a cloud service for a managed database but instead this week I chose to set up WAL-based continuous backup to R2 and point-in-time recovery for my Postgres instance.
This would have been unthinkable for me a year ago but here we are.
All the processes are meticulously documented in a git repo, and I did a disaster recovery test today which spun up a new server and restored the DB. It was quick and seemingly seamless.
This experience has been encouraging and it’s certainly more comforting knowing I have point-in-time recovery rather than the previous hourly pg_dump backup strategy. I’ve never had to do a restore procedure with a managed database, but I’m sure it’s simple and only requires a few clicks in a UI, but perhaps it’s actually harder to test than my scriptastic approach? I don’t know, but the reality is that we can now choose to do hard things when before we couldn’t, so why shouldn’t we?
I think in a real disaster it would make sense to install Claude and my docs repo on the server and have the AI execute the procedure for me. It wouldn’t be stressed, and it would have a better grip on the situation. Of that I have no doubt.
In tech today, we’re truly standing on the shoulders of giants. I’ve been around this block for decades now, but the potential of the AI revolution continues to astonish me like nothing before it.
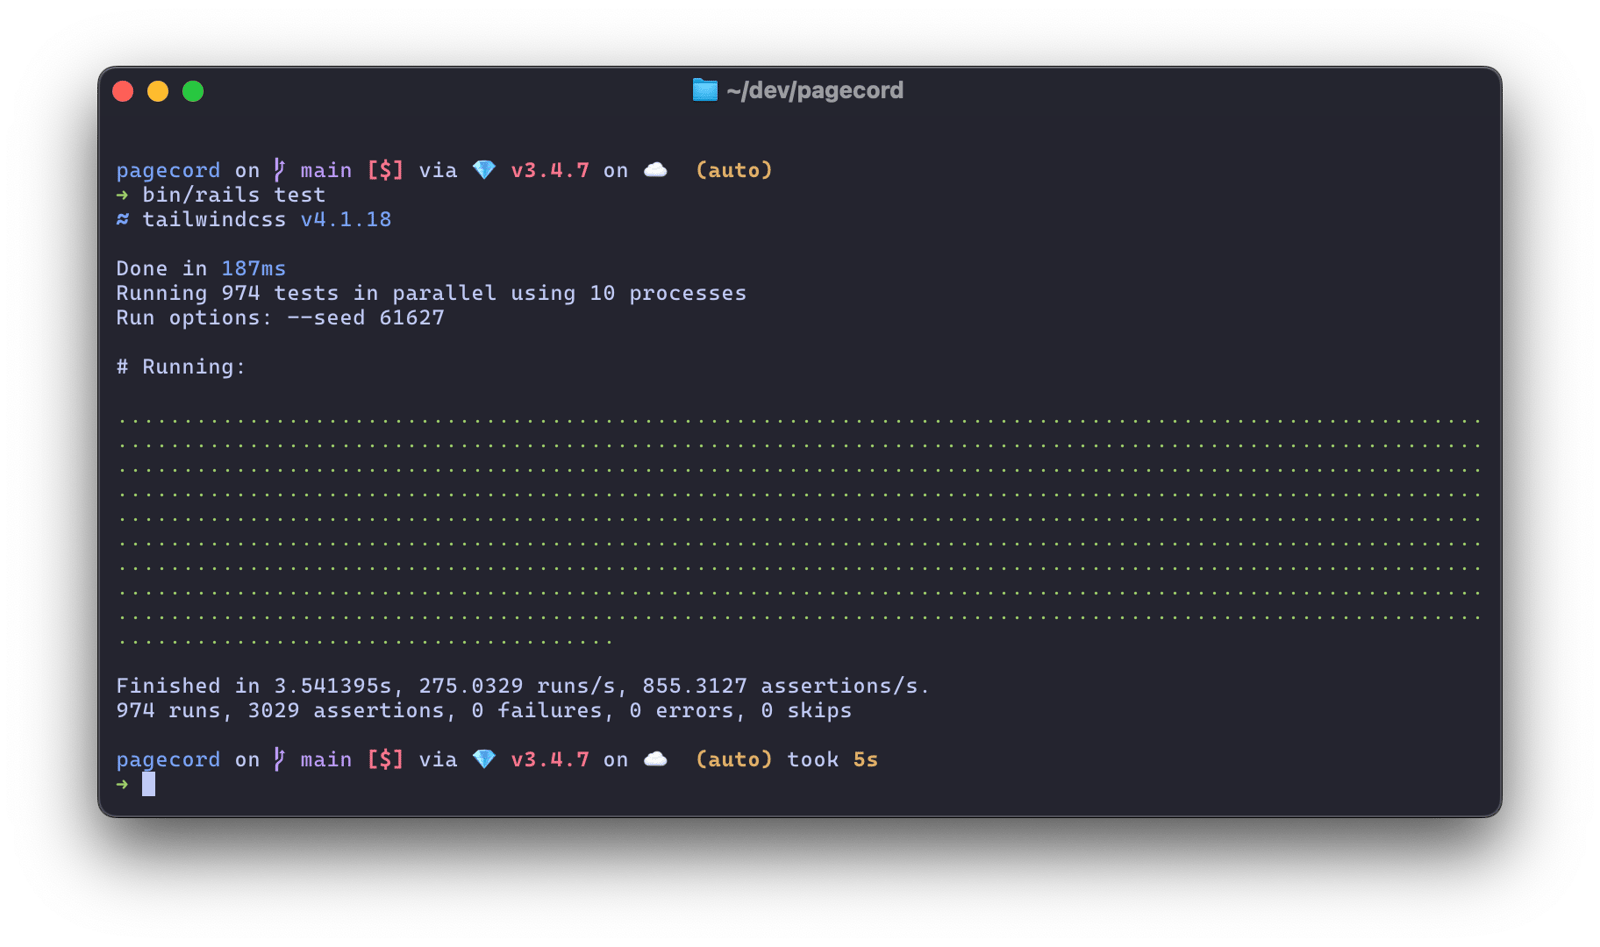
I saw DHH tweeting about the Basecamp test suite and it's mightily impressive. Similarly, the Pagecord test suite (974 tests) runs in 3.5 seconds on a 4-year old M1 Max MacBook Pro.
I can't understate what a delight this is!
By comparison the FreeAgent test suite (when I left) took 10 minutes when running on a gargantuan number of AWS servers and would take several hours on a single laptop. Mainly because of factories, RSpec, system tests and, well, probably mass over-testing in general. Truly suffocating (my bad).
(There are 17 system tests in Pagecord which take 20 seconds but I let GitHub Actions deal with those before I deploy. I think I could delete them tbh.)
I’ve been building a numberofapps using Rails recently and they run on servers that are, shall we say, not particularly optimal. I’m from Yorkshire and I live in Scotland so thriftiness is ingrained.
In a standard Rails app, all the bundled assets – your Javascript and CSS – are served directly from the app. The HTML will look something like this:
It’s nice and simple but you might want to offload this traffic from your app to a CDN. This will save you CPU cycles and it will make your app feel snappier for people. It can make a big difference.
I decided to try and do this for my apps using AWS Cloudfront as the CDN. It was a little fiddly to get my head around so I decided to write it up here in case you’ve been trying to do the same. Hopefully it will just work™ but, of course, YMMV.
There are two different configurations you'll need to go through depending on your use case. The first is for serving Rails assets (which all Rails apps can use), the second for Active Storage. I’ll deal with each in turn.
Using a CDN for the Rails asset pipeline
Rails makes it easy to change the name of the host used for serving assets. All you need to do is set the asset_host config like this in your production.rb:
config.asset_host = ENV['ASSET_HOST']
In my use case, I wanted to keep the mailer asset host on my own domain (not on the CDN), so I have a separate line in my config for this:
As we haven't configured a CDN yet, you should set ENV['ASSET_HOST'] to your app domain for the time being.
Configure AWS Cloudfront
Creating a “distribution” in Cloudfront is fairly straightforward. I braved the AWS UI to do this but if you’re cleverer than me you could write Terraform or CloudFormation to automate it. Here’s how I did it in the UI.
First create a new distribution. This will give you a domain which represents the CDN for your assets and it will look something like https://askj23h42jk.cloudfront.net.
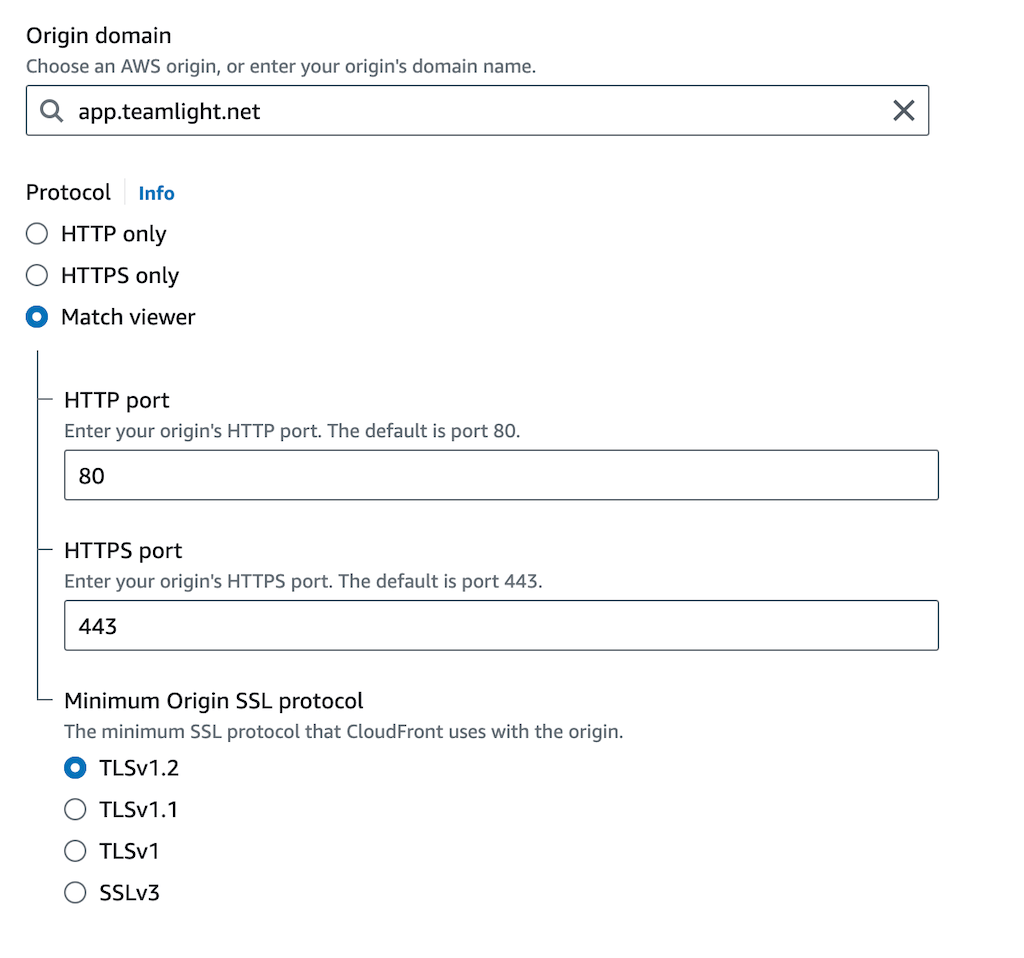
Configure the origin of the distribution in the “Origin” tab. The domain should be your app domain, and configure the protocol to match the viewer. You might be able to choose HTTPS only (which sounds better), but Match viewer works for me and I ain’t touching it!
Configure custom headers as below (obviously replacing the origin domain with your own). This part is the secret sauce.
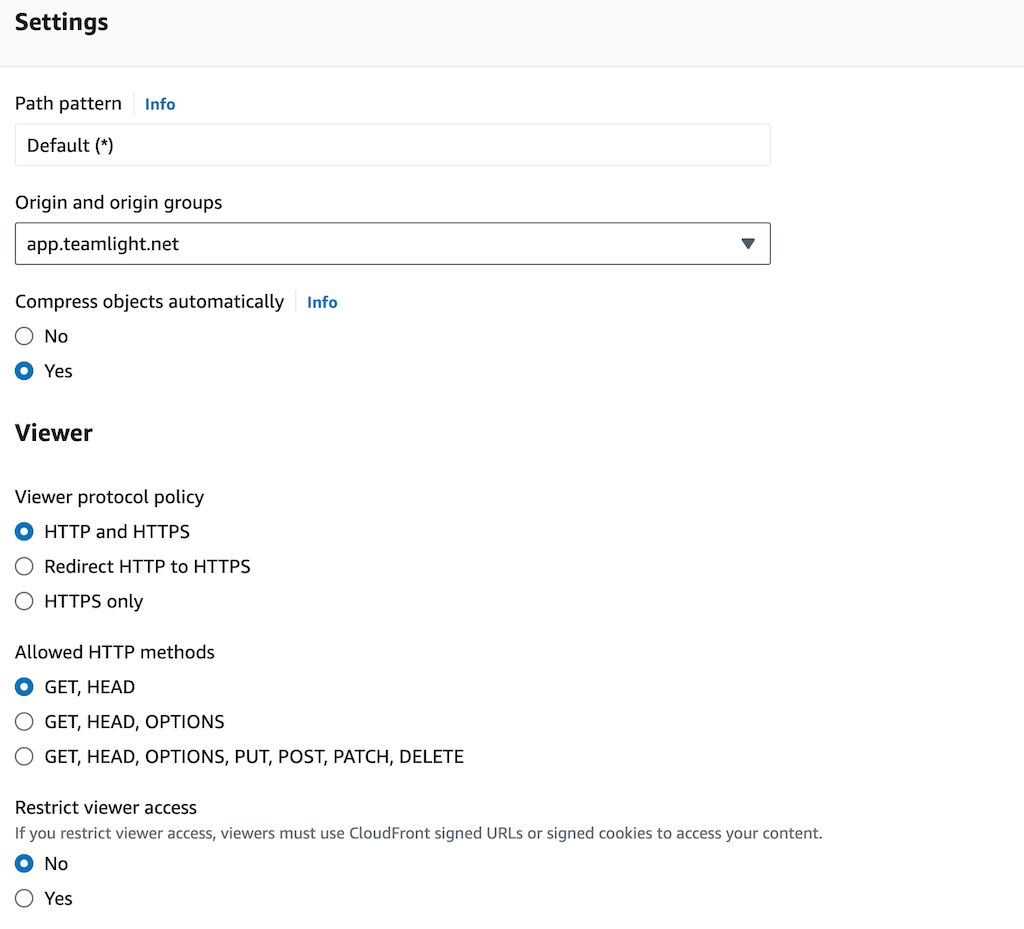
Configure the behaviour of the distribution in the “Behaviour” tab. Select your origin from the drop down and configure the Viewer settings. I found I had to pick HTTP and HTTPS for reasons that are beyond my brain capacity.
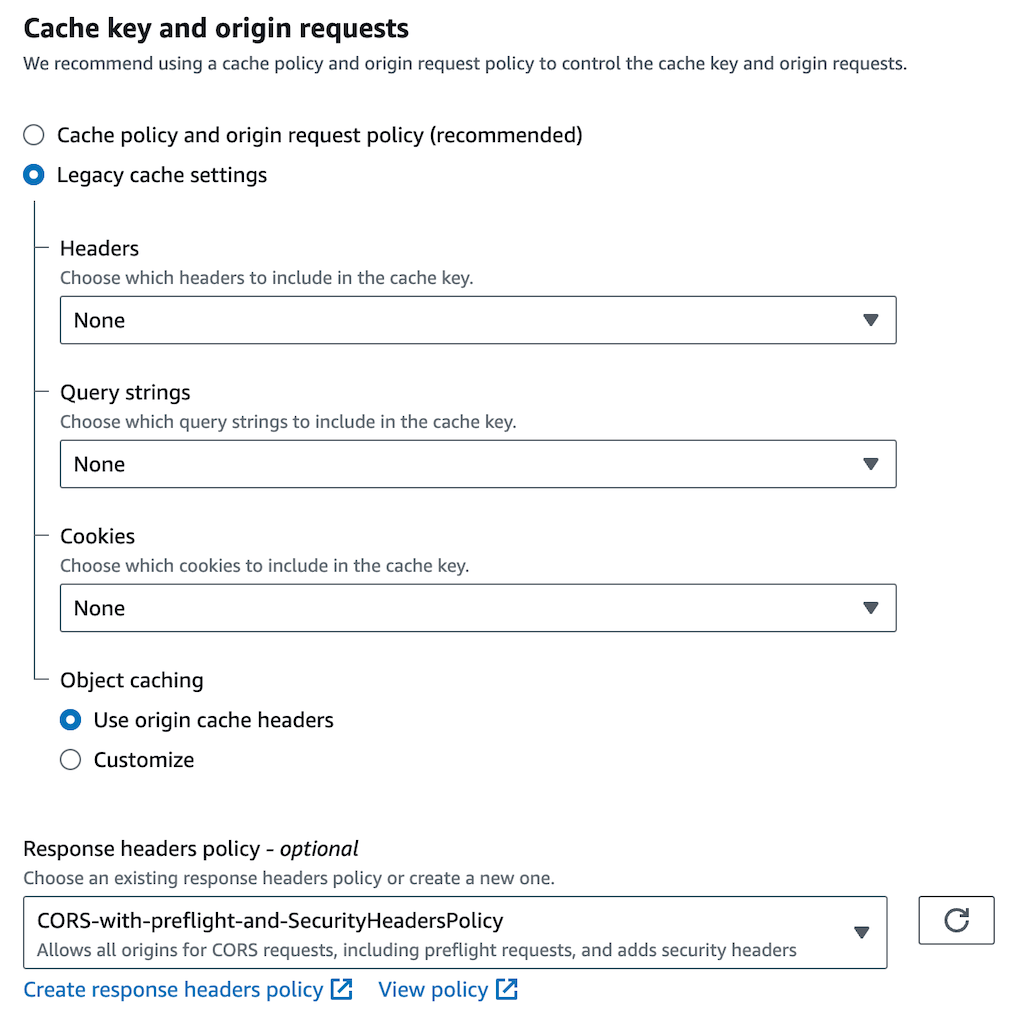
Although “Cache policy and origin request policy” is recommended, I found I had to use Legacy cache settings to get it working. The key thing here is the Response headers policy which you should set to CORS-with-preflight-and-SecurityHeadersPolicy.
That’s it! Simple, right? 💀
Your new distribution will have a domain like https://d28o4jfr91no89.cloudfront.net. Now you can configure your app so that the ASSET_HOST environment variable is set to this domain and, voila, your assets are now being served via a CDN! 🥳🤞
This is where the big prize is. In one app I built recently I was dealing with a lot of photo attachments (up to 500 per customer order), and they all lived on S3. I didn’t want my photo gallery requests hitting the app, or even my Caddy server. I wanted them to be served directly from my CDN, so they loaded quickly wherever the user was and so my app didn't have to deal with all the image requests.
Active Storage should be configured to use your S3 bucket. Your storage.yml will look something like this:
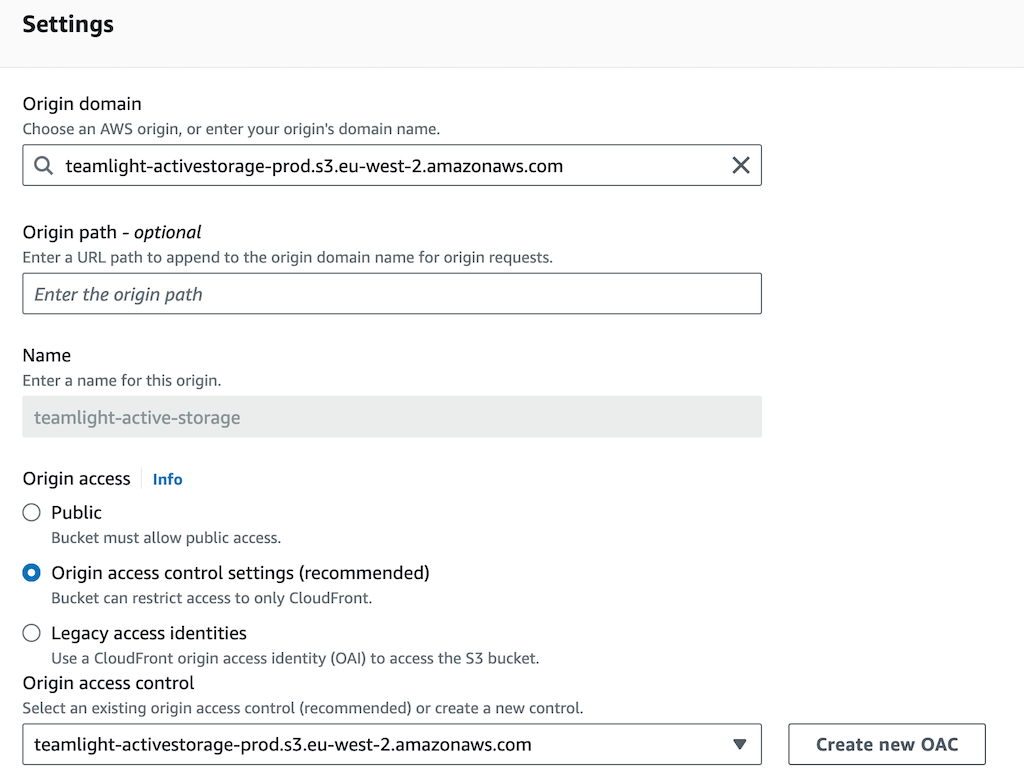
Create a new Cloudfront distribution (don’t re-use the asset pipeline one – it won’t work!). Configure the Origin of the distribution in the “Origin” tab. The Origin domain should be set to your S3 bucket (it will appear in the dropdown), and you should also pick this for Origin access control.
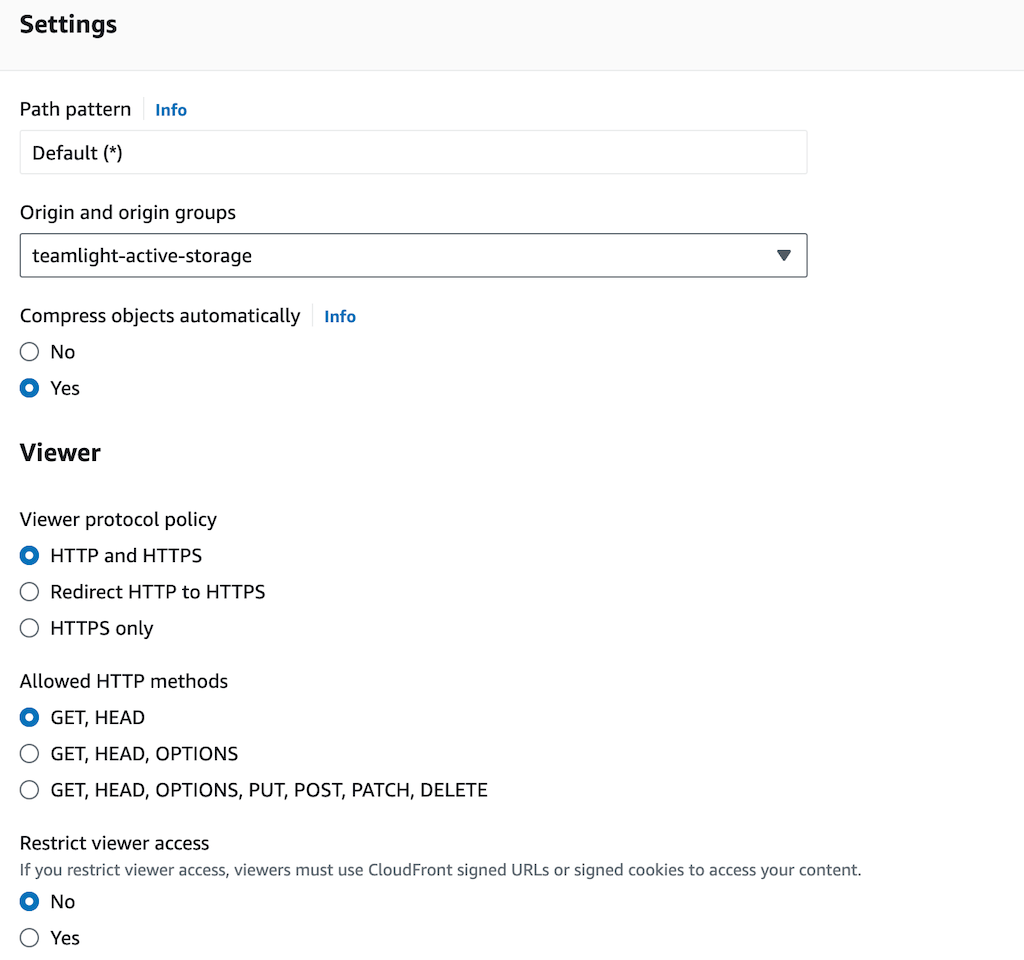
Configure the behaviour by clicking on the "Behaviour" tab, select your S3 bucket as the origin and choose the HTTP and HTTPS protocol policy.
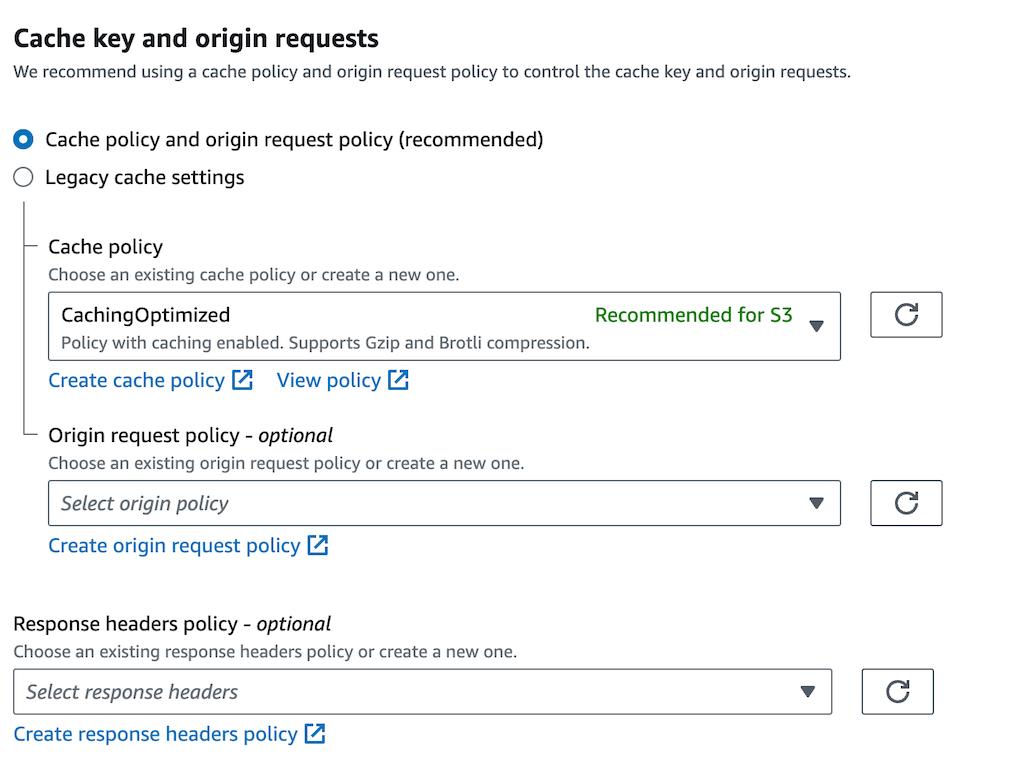
In the Caching section, choose the CachingOptimized cache policy:
Finally you need to configure the bucket policy of your Active Storage S3 bucket so that your new Cloudfront distribution can access it. You’ll need the Cloudfront ARN value for this, which you can find on the General tab when viewing your Cloudfront distribution.
Create a new direct route in routes.rb that points to the CDN if the ACTIVE_STORAGE_ASSET_HOST is configured:
direct :rails_public_blob do |blob|
   # Preserve the behaviour of `rails_blob_url` inside these environments
   # where S3 or the CDN might not be configured
   if ENV.fetch("ACTIVE_STORAGE_ASSET_HOST", false) && blob&.key
    File.join(ENV.fetch("ACTIVE_STORAGE_ASSET_HOST"), blob.key)
   else
    route =
       # ActiveStorage::VariantWithRecord was introduced in Rails 6.1
      # Remove the second check if you're using an older version
      if blob.is_a?(ActiveStorage::Variant) || blob.is_a?(ActiveStorage::VariantWithRecord)
         :rails_representation
      else
         :rails_blob
      end
    route_for(route, blob)
   end
end
In your app, change the URLs for assets that you want served from the CDN to use this new rails_public_blob_url route:
Configure ACTIVE_STORAGE_ASSET_HOST to point to your new Cloudfront distribution domain and restart your server. Your Active Storage images should now be served from the CDN! 🎉
There are probably nuances I’ve missed here, but I've done it a few times and this approach seems to work well for me. There are a lot of steps to go through and it’s easy to miss something, so I’d recommend creating development buckets to test with first just to make sure it all works.
If the worst happens and you deploy to production and it goes pear shaped, just change your ASSET_HOST environment variable back to your app domain (for assets), or remove ACTIVE_STORAGE_ASSET_HOST (for Active Storage), and restart your app to get things back to normal.